What Is Light Painting Photography? A Photographer’s Inside Account of the Technique
People ask me some version of the same question at almost every show I attend: “How do you get the light to look like that?”
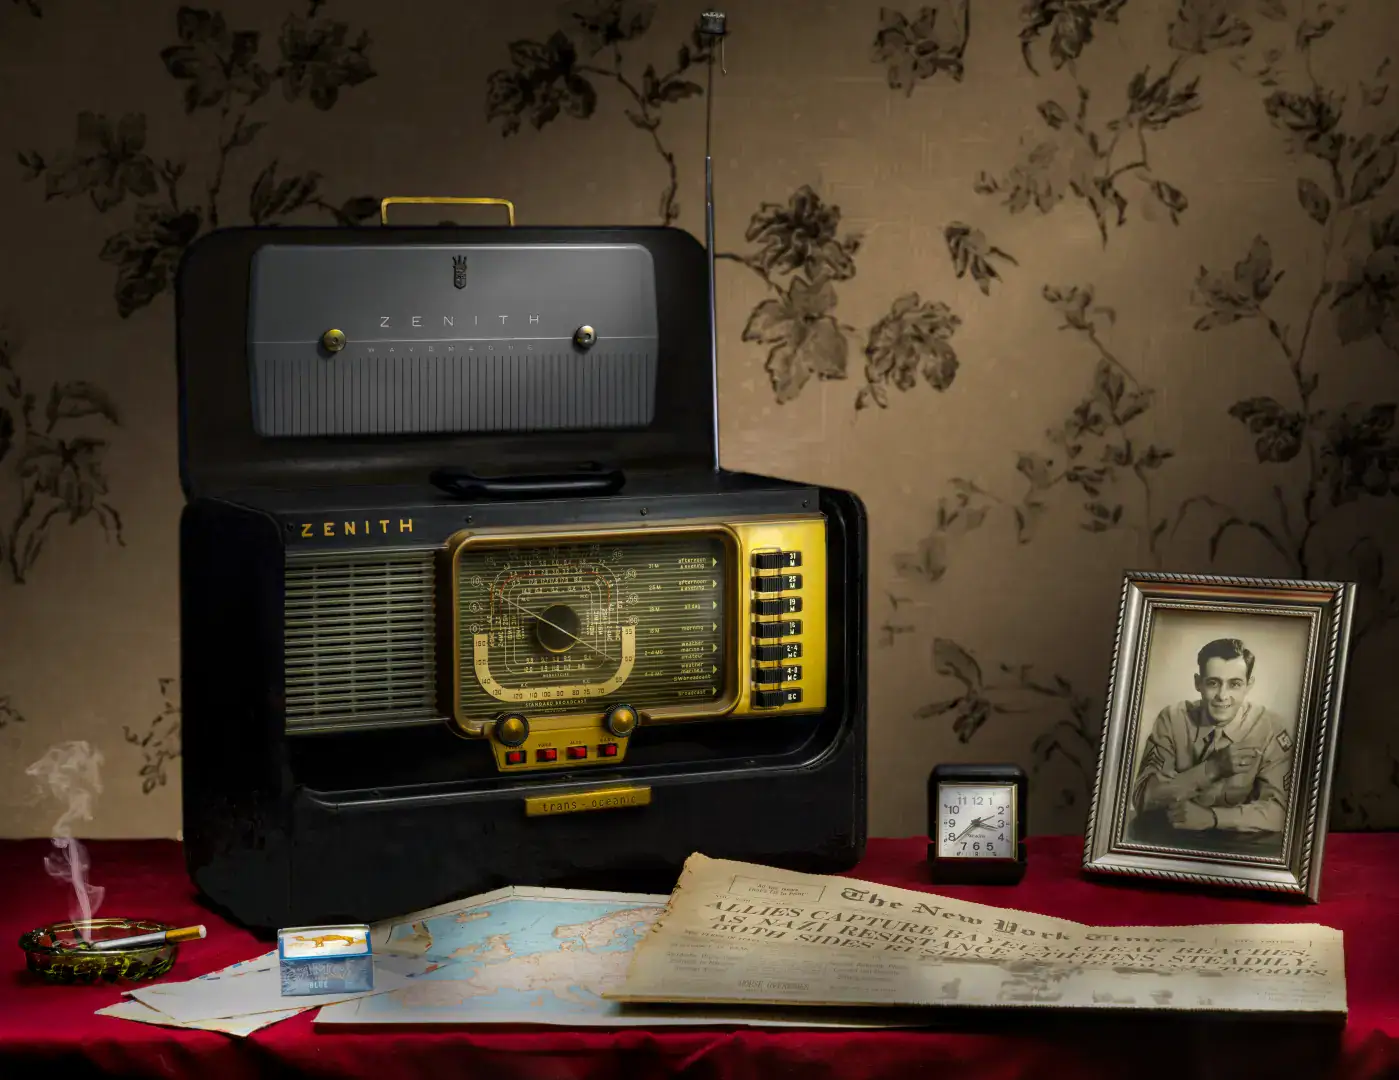
It’s a fair question. The images I make — warm pools of light falling across a vintage radio, deep shadows gathering in the corners of a still life, colors that seem to glow from within rather than bounce off a surface — don’t look quite like what most people expect from a photograph. They look more like paintings. That’s not an accident. It’s the whole idea.
Light painting photography gives photographers a degree of control over light that closely resembles what a painter has over a canvas. In conventional photography, you arrange your scene, set your exposure, and work with whatever light is available. In light painting, you work in complete darkness and introduce light selectively — exposure by exposure — using handheld sources to illuminate specific parts of the scene with precision no fixed studio light can match.
This post explains how light painting photography works, what distinguishes still life light painting from other forms of the technique, and why the results look the way they do.
The Two Meanings of “Light Painting”
It helps to start by clarifying the term, because “light painting photography” describes two related but different practices.
The more widely known version involves using a light source to draw or paint in the air during a long exposure, creating trails of color against a dark background. You’ve likely seen images of this: a person waving a flashlight to write their name in glowing script, or light trails arcing through a dark outdoor scene. This is light painting as in-camera drawing — the camera records the path of the light source as it moves through space during the exposure.
Still life light painting is something different. Here, the technique isn’t about drawing light in the air. It’s about using a handheld light source to selectively illuminate real physical objects in a darkened studio, one area at a time, across a long series of individual exposures. The goal is not to create a light trail but to build an image through the deliberate accumulation of precisely placed light.
The two techniques share the same foundational principle — a long exposure in a dark room, a handheld light source. But they do entirely different things. Still life light painting is, at its core, a method for constructing studio lighting with a precision and intentionality that fixed lights cannot achieve.
How Still Life Light Painting Photography Works
Every exposure begins the same way: the studio goes completely dark. The camera sits on a tripod. The shutter opens. In that darkness, I use a handheld light source to illuminate one specific part of the scene.
Here’s what most people don’t realize: I’m not trying to light the entire composition in a single pass. I light each object — or each part of an object — in its own dedicated exposure. A typical composition requires fifteen to thirty individual captures. Each one isolates a different element with a different light source, from a different angle, at a different distance.
What Each Light Source Does
Different light sources do different things. A small flashlight with a diffuser, raked across a surface at a shallow angle, reveals texture with an intensity nothing else can match. An LED panel with a scrim produces softer, more wrapping light that suits certain objects and transitions. A narrow wand of light can reach tight spaces, trace a specific edge, or coax a highlight out of a curved surface with surgical precision.
I return to that dark room again and again — adjusting, trying, evaluating, trying again — until each element has received the light it needs. A finished image can represent several hours in the studio across multiple sessions, with failed exposures discarded and replaced until every element contributes exactly what I need it to contribute.
Assembling the Image: Where Light Painting Becomes Painting
Once the individual captures are complete, the work moves into Photoshop — and this is where the process becomes most like painting.
I bring each capture into a layered Photoshop file. The base of the image is a fill light capture: a softly lit exposure of the entire scene that holds the foundational tones and shadow detail. Every subsequent light-painted capture sits above it as its own layer.
The Lighten Blending Mode
The key is the blending mode. I set each light-painted layer to Lighten. Only the areas in that layer that are brighter than the underlying image show through. The dark areas — everywhere the light didn’t fall during that exposure — become transparent, revealing the layers below. The light adds itself to the image exactly where I placed it, and nowhere else.
Even with Lighten blending, each layer needs shaping. Each one starts with its mask filled entirely with black — completely hidden. Then I paint on the mask with a soft-edged brush at low opacity. I use white paint to gradually reveal the light from that capture: a highlight here, a transition there, a subtle warmth on the near edge of an object that pulls it forward. The brush opacity stays around ten percent. Changes accumulate gradually and softly, without harsh edges or abrupt transitions.
Assembling twenty or more layers this way is slow. It is also where the image actually becomes itself. The shooting stage is deliberate and controlled. The Photoshop stage is where I decide how deep the shadows go, how warm the light reads, and how much of the background stays withheld.
The Equipment Behind Light Painting Photography
People often ask what equipment they need to start. The short answer: less than you might expect. The technique demands time and attention more than specialized gear.
The essentials are a camera with a manual mode capable of long exposures, a tripod, a remote shutter release, and a dark room. Almost any modern DSLR or mirrorless camera will work. The technique predates digital photography by decades.
Building a Light Source Kit
The light sources are where real variety enters. I use LED panels of various sizes, small handheld flashlights with diffusers and gels, fiber optic brushes for fine highlight work, and custom-built modifiers for specific effects. Most light painters build a collection of tools matched to the subjects they work with most. For still life with small objects, control over the size and shape of the light source matters far more than raw output power.
What matters most, though, isn’t the equipment. It’s the eye. Light painting photography is fundamentally about understanding how light falls, how surfaces respond to different angles and distances, and how shadows contribute as actively as highlights. Those skills develop through time in the studio, not through gear investment.
For post-processing, Photoshop is the industry standard. The Lighten blending mode layering approach I described above comes from photographer Harold Ross, whose workshops and teaching form the technical foundation for serious still life light painting.
What Light Painting Photography Produces That Other Methods Cannot
The most common response people have to light painting still life is that it looks like a painting. This isn’t a superficial observation — it points at something real about what the technique makes possible.
Fixed studio lights constrain conventional photography. A softbox illuminates everything it can reach. A reflector bounces light according to its angle and distance. The photographer works within those constraints, arranging lights to achieve the best overall result they can.
The Specificity Light Painting Achieves
Light painting removes those constraints. I can light each element of the scene in its own dedicated exposure, from its own direction, with its own light source, at its own distance. I then combine and blend those exposures in Photoshop with full control over the opacity and falloff of each. The result is a specificity of light that no fixed studio setup can reproduce.
The highlight on the near edge of an object can be brighter than the one on its far edge — even if both are the same distance from the same softbox. The reflected light catching the underside of a bowl can be warmer than the main light on its rim. The transition between a lit surface and the shadow behind it can be as gradual or as abrupt as the composition requires. Physics doesn’t decide. I decide.
This is the quality that makes the work look more like painting than photography. Every area of light and shadow results from a deliberate decision. Nothing is accidental. Nothing is the byproduct of where I happened to position a light. I build the image one controlled illumination at a time toward a specific visual result. Viewers register this quality even when they can’t name what they’re seeing.
The Connection to Painting — and Why It Matters
The connection to painting isn’t just technical. It runs into the history of how we think about light as a subject in visual art.
The painters who have most influenced my work — Caravaggio, Vermeer, Rembrandt — each studied the same problem: how to use light and shadow on a flat surface to create the experience of looking at something real and luminous. Caravaggio didn’t use chiaroscuro as a stylistic flourish. It was a considered position about what light does when you let it tell the truth about a surface: it falls where it falls, and everything else is darkness.
Working on the Same Problem
Still life light painting lets me work on the same problem with physical objects and real light. The camera doesn’t idealize or misremember the surface it records. But the control the technique provides — over where light falls, at what intensity, from what direction — lets the results carry the same quality I find in the painters I admire. The image seems to glow from within. The light appears there with specific intent. The shadows hold something rather than simply lacking illumination.
The Tolstoy quote on my homepage — “All the beauty of life is made up of light and shadow” — is not primarily about photography. It’s a philosophical statement about what makes an experience feel real and worth attending to. Light painting photography, at its best, works at that threshold.
For a walk through the compositional decisions that happen before a single light goes on, read Before the Lights Go Out: How I Build a Still Life Scene. The full still life portfolio is here.
If this technique is new to you, the best way to see it in person is at the Pittsboro Gallery of Arts, where I exhibit as a member of the Chatham Artists Guild. For more on how these images come together, from concept to finished print, The Art of Light and Shadow blog is where I write about the process in depth.